Me, taking a hike.

On Saturday I went on my first ever hike. Cuan and I walked 9km through the forest with friends. Afterwards we made a fire and had a good old South African Braai. It was GREAT fun. I thought I’d share some pictures with you.


Setting off!


Why did the mushroom go to the party...?


...Because he was a fungi to be with! (Sorry.)


Out in the bush, stealth is everything.


All going up in flames...


Never come between a man and his tongs.


A few things I learnt on my first hike:

  • Wear PROPER hiking shoes. They provide ankle and arch support that normal shoes do not. Walking for long periods without proper support can cause knee, hip and ankle injuries (take my word for it – I hurt my knee after 9K of walking in trainers!)
  • Take snacks. A mixture of nuts, dried fruit and dark chocolate is delicious and energy dense, helping fuel your journey without having to carry heavy items on your back.
  • Take plenty of water. But PACE YOURSELF! Don’t drink it all in the first km, or you’ll be left thirsty and stuck in the forest with a full bladder!
  • Take a roll of toilet paper. Just in case you don’t heed the above.
  • Take a camera. There’s SO much to see on a hike – it’s nice to go home with a few snaps.
  • Wear comfortable, weather-appropriate clothing. Shorts and tank-top in warm weather, cargo pants and a T-shirt in cooler months. Take a lightweight waterproof jacket in case of rain.


On another note, thanks to April for the lovely review she wrote on the album! You can check it out here.


And finally, now is your last chance to help Japan by taking part in an online bake sale! Head over here and place your bid now!


Well, that’s all for today. Hope you’re all doing well!

Love,

Mali.xxx


My New Training Schedule

Hi guys,


A quick post today. Thought I’d update you all on my new weight-training program. Without further ado, here it is:


3 sets of 8-12 on each of the following exercises:


Monday: Biceps, Triceps

Biceps Curls

Hammer Curls

Bench Dips

Kickbacks


Tuesday: Quads, Hamstrings

Dumbbell Squats

Sumo Squats

Stationary Lunges

Straight-Leg Dead-Lifts


Wednesday: Back

Bent-Over Row

Lying Back Extension

One-Armed Bent-Over Row

Upright Row


Thursday: Abs, Calves

Weighted Crunch

Plank

Dumbbell Calf Raise

Angled Calf Raise


Friday: Chest, Shoulders

Push-Ups

Dumbbell Bench Press

Lateral Raise

Shoulder Press


Saturday and Sunday are chill-out days! Maybe some walking/hiking (details on my first ever hike coming soon), or just vegging out (although being a musician I often work on weekends). Rest is important too, y’know.


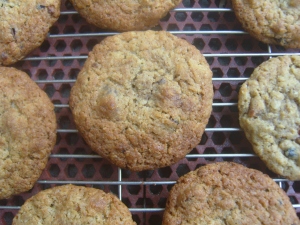
Coming soon, the recipe for these here cookies:


Loaded Oatmeal Cookies


Have a great evening!

Mali.xxx


My very own baked oatmeal…

It was dark and dreary this morning in Knysna, South Africa. It was the kind of morning where you have to turn on the kitchen light while you make breakfast, and the ground is wet outside and the sky is grey. The kind of morning that reminds me of my homeland, England. And what could be better on an autumn morning than oatmeal?


The Amond Brothers

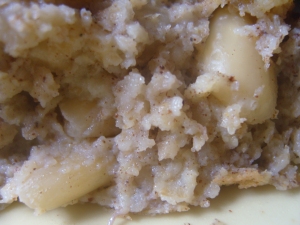
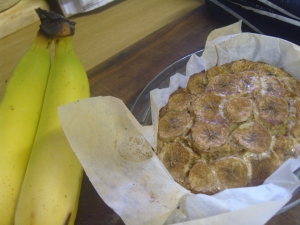
I know it may seem like I’m obsessed with oatmeal, but… ah, who am I kidding? I am! After enjoying Katie’s baked oatmeal recipes, I wanted to try my hand at creating my own. I wanted some additional protein to aid my weight-training recovery, so I added an egg (eggs are another thing that I’ve re-introduced into my diet and am eating in moderation). And I love a good banana, so into the pot and out of the oven came…


Hot 'n' fresh out the kitchen

Banana-Nut Baked Oatmeal

  • 1/3 cup oats
  • 1 banana
  • 1 egg, beaten
  • ¼ cup rice milk (or other milk of your choice)
  • ¼ cup applesauce/pear sauce (I used pureed canned pears)
  • 1/8 tsp bicarb/baking soda
  • ½ tsp cinnamon
  • Pinch salt
  • Handful of almonds (I used whole, blanched)
  • 1 tbsp melted butter (optional, but it makes such a difference to the flavour – you could sub with a different fat, such as oil or nut butter)


  1. Preheat oven to 180/350. Line a small baking dish or 1 large/2 small ramekin with greaseproof paper/baking parchment.
  2. Cut the banana in half. Mash half and set the other half aside.
  3. Mix the rest of the ingredients together well and add the mashed banana.
  4. Pour into your prepared dish. Slice the remaining half of the banana and arrange slices on top of your oat mixture. Sprinkle with more cinnamon.
  5. Bake in your preheated oven for about 20 minutes, or until inside is set but still moist and top is well-browned.


Bananarama

In non-food news, today we’ve been recording the acoustic version of Atlases & Astronauts, which will be available as a free download for those who pre-bought the album, or purchasable for those who didn’t. I love music, but I find recording very stressful! The perfectionist in me comes out and makes the process very slow and difficult, which defeats the object when the recording is meant to be “live”. Still, I’m looking forward to the end result.


Tired eyes and excess facial hair: the result of too many hours spent in the studio (photo courtesy of Warren Fleming - http://www.ianfleming.co.za)


Hope you all have a great day!

Mali.xxx


If I had a boat(meal)…

Monday marked the return of weight-training to my exercise routine. I forgot how much I DON’T enjoy the actual workouts themselves! But the feeling afterwards is unbeatable. I love knowing that I have taken an active step towards getting stronger, and I enjoy that sore feeling the next day because then I know that I’ve pushed myself.

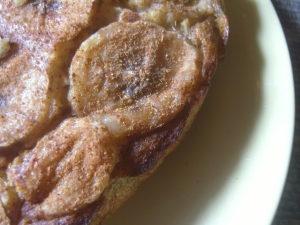
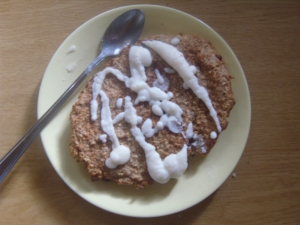
Yesterday morning I made Chocolate-Covered Katie’s Cookie Dough Oatmeal Cake (or “Boatmeal,” as she sometimes likes to refer to her Baked Oatmeal treats!).  This was super tasty – warm, squidgy and buttery, with a nice crunchy crust on top.

It even looks like a boat...

I pretty much followed her recipe, the only differences being the following:

  • I used a mixture of cacao nibs and chopped almonds instead of chocolate chips
  • I used pear sauce instead of apple sauce (just canned pears blended till smooth)

In terms of the “optional” aspects of the recipe:

  • Like Katie, I omitted the sweetener, as the pear sauce gave it enough sweetness for my taste
  • For the liquid, I used water
  • I included the ½ tsp cinnamon
  • For the fat, I used 1 tbsp melted butter (the real stuff – I’m not scared of it)

I sprinkled it with more cinnamon before baking and then topped with a tbsp coconut butter (small amounts of coconut seem not to be bothering me, so I am enjoying about a tbsp of coconut butter a day).

That’s all I’m telling – if you want the rest of the recipe you will have to go to the original source – www.chocolatecoveredkatie.com

Despite a successful breakfast, this morning wasn’t all plain-sailing. After taking the “Boatmeal” carefully out of the oven, I then proceeded to burn two of my left-hand fingers on the dish. Burning the fingertips of your left hand is NOT a good plan when you play guitar for a living. Luckily, the skin on those fingers is fairly tough, due to the guitar-playing. I decided to try a trick I learned from my step-mum – don’t run the burns under cold water, but rather warm/almost hot water. Though it gives instant relief, using cold water will cause your body to send more heat to the area, making it worse in the long run. Warm/hot water will have the opposite effect (just be sensible and don’t use scalding water). It really worked! There is a slight heightened sensitivity, but that’s all. There is no blistering, and the eye would never know that a burn ever occurred.

In other news, look who we found in the garden today:


I named him Jethro


I was NOT happy to have to put him back into the wild. Such a sweet little thing. We could’ve been great friends.


By the way, the album launch was amazingly successful! I will fill you in later on in the week.


Much love,

Mali


The Coconut Crisis

Anyone who reads this blog semi-regularly will know that I have a bit of a “thing” for coconut. I have a tendency to add it, in some shape or form, to pretty much anything I consume.

For a few weeks, I was repeatedly experiencing dizzy spells, accompanied by severe nausea and shaking. I didn’t associate it with what I WAS eating, but rather thought it was due to a drop in blood sugar from gaps between meals. Then one night, after vomiting at 3am, my husband very sweetly said to me, “Do you not think maybe it’s all the coconut you’ve been eating?”

Thank you my love, but really… how could you suggest such a thing? Coconut is up there in my Top 10 Foodstuffs – how is it possible that I be allergic to it, even in a small way?

Then I ran through what I’d eaten that day in my head. Sure enough, coconut had been consumed at every meal: 1/4 cup mixed into my morning oats, a coconut cappuccino to accompany my lunch, and two banana-coconut muffins topped with (wait for it…) coconut butter at dinner.

The next day, I stayed away from coconut for the first time in a couple of weeks. And guess what? No nausea. It seems that the coconut I love so much does not love me.


"I just don't feel the same way..."


Since then, I have eaten small amounts of coconut seemingly without too much of a problem, so either I am mildly allergic or it’s just one of those foods that is not meant to be consumed in copious amounts. Either way, my intake has been dramatically reduced, so expect less coconut-based recipes from now on! Thankfully, I have a backlog of recipes that I am yet to share… one of which includes the following:


Tropical Banana Muffins

(Adapted from this recipe)

  • ½ cup soy milk
  • 1 tsp vinegar
  • 3/4 cup buckwheat flour
  • 3/4 cup chickpea/garbanzo bean flour
  • 3/4 cup tapioca flour
  • 1 1/2 tsp baking powder
  • 1/3 tsp baking soda/bicarb
  • 1 1/4 cups mashed, super-ripe bananas (about 3-5, depending on the size)
  • 1 cup sugar
  • 1/2 cup oil
  • 1 tsp cinnamon
  • About 1/2 a clove of nutmeg, freshly grated
  • 1 tsp salt
  • 1 1/2 tsp vanilla essence
  • 1/2 cup desiccated coconut
  1. Preheat oven to 325/163.
  2. Whisk together soy milk and vinegar, and let rest for 10 minutes or so until the mixture thickens/curdles.
  3. Mix together the banana, sugar, oil, spices, salt, vanilla and the thickened soy milk.
  4. In a separate bowl, mix together the dry ingredients. Add the wet mixture and mix until just combined (do not over-mix or you will end up with chewy muffins).
  5. Fill lined muffin tins to the top with the mixture, and bake for 25-30 minutes or until a skewer comes out clean.


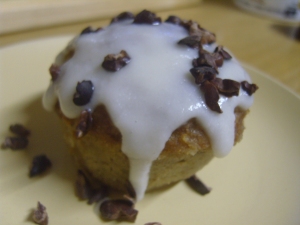
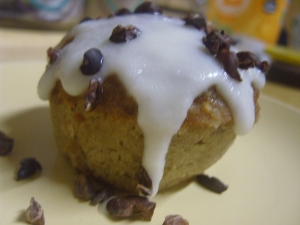
A bit of drizzle 'n' crunch


Tastes great plain, or topped with coconut butter and cacao nibs, as pictured above.


Maybe one day I’ll be able to eat them again…


Mali.xxx


An Educational Post: The South African Braai

On Monday we celebrated Cuan’s brother’s Birthday with a classic South African Braai. Now, I am aware that the majority of my readers are probably not South African and as such are asking, “What is this braai you speak of? What does it mean?” A braai (pronounced, like the first syllable of the name Brian, NOT “bray”) is essentially a South African Barbeque. But there are a few fundamental differences between the barbeque and the braai:


  • A braai is not weather dependent – if the South African male can find a square meter of shelter outside, he shall cook meat on grid in monsoon conditions if necessary
  • A braai almost always comprises a large, real, man-made fire and very rarely a gas-run machine, and never one of those self-contained kits of coal and firelighters in a foil pie dish that UK-folk like to take camping.
  • The quantity of meat cooked on a braai vastly outweighs that of a barbeque. At any given braai, there will always be at least three times the necessary serving of meat per person. As such, a braai either leaves one feeling nauseatingly full, or with a fridge full of cooked flesh.


"Woman! You are delegated to salads!"


Interesting fact:

The Afrikaans for “meat” is vleis, which directly translates as “flesh”. Appetising, ja?


To the braai, I took the following salad (which  I forgot to take a photo of, so you will just have to take my word for it that it was beautiful and delicious!):


Butternut, Black-Eyed Bean and Kasha Salad with a Spiced Honey Dressing

  • 1 small butternut squash, peeled and diced
  • Ground cinnamon, mixed spice, coriander and cumin
  • 1 cup black-eyed beans, cooked, drained and rinsed
  • ½ cup kasha (buckwheat groats)
  • ½ cup frozen peas
  • ¼ cup sesame seeds

1. Steam, roast or microwave the butternut until tender. Drain if necessary, sprinkle liberally with the cinnamon, mixed spice, cumin and coriander and set aside to cool.

2. Bring the kasha to the boil in salted water, lower heat and simmer gently for 10 minutes. Drain, rinse in cold water and set aside.

3. Boil the frozen peas in salted water for about 4 minutes until cooked. Drain and cool.

4. Once all ingredients have cooled, combine in a large bowl and pour over dressing. Season to taste.


Spiced Honey Dressing

  • 1 tbsp honey
  • 2 tbsp olive oil
  • 2 tbsp lemon juice
  • 2 tbsp soya milk
  • 2 tbsp hot peri-peri sauce or other hot sauce of choice
  • 1 tbsp soy sauce
  • ½ tsp Worcestershire sauce
  • 1 tsp curry powder
  • Salt and pepper to taste
  1. Stir together the soy milk and the lemon juice and leave for a few minutes to thicken.
  2. Add the rest of the ingredients and whisk together till thoroughly combined and emulsified.
  3. Pour over the salad before serving.


I hope you have enjoyed today’s cultural education!


Lossalove,

Mali.xxx


How To Poach An Egg

So for the extent of my exclusion diet, I have (as a general rule) been avoiding eggs, wheat and dairy. But yesterday, as I sat in my favourite coffee shop (Chaplin’s, Woodmill Lane, if you’re asking, which you weren’t) working furiously away on my laptop and taking advantage of their free Wi-Fi, I developed a poached-egg craving. So I thought, stuff the exclusion diet, today I’m going to eat what I want.
 

Perf-egg-tion!

Poached eggs have been my nemesis for the extent of my cooking career (I use the term “career” loosely, in the way that one might describe wearing clothes, or any other necessary daily activity). Without one of those special cheat-pans, my eggs just dissolve into a stringy mass of albumin floating in a sea of frothy salt-water, the yolk sitting isolated at the bottom of the pan, long-since detached from its white partner. Yesterday, all that changed. “But Mali, why didn’t you just use the cheat-pan like you always do?” I hear you ask. Truth is, an egg just tastes better when poached the “real” way. Plus, when something gets the better of me, I have a tendency to take it as a personal insult, and I was not about be beaten by an egg (no pun intended). So after a bit of online research I armed myself with a loaf of Chaplin’s-baked bread and went home to set about my eggy business. The result was a delicious, in-tact poached egg, with yolk oozing seductively onto my soft, white, liberally-buttered bread.
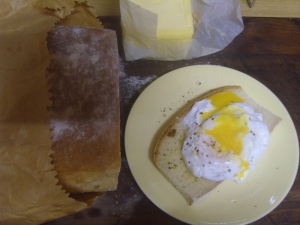
Yesterday's Egg

Ironically, before I started cooking, I had a stomach ache, but after I had finished devouring my egg, wheat and dairy feast, the stomach ache disappeared. So perhaps my problems are not food-related after all.

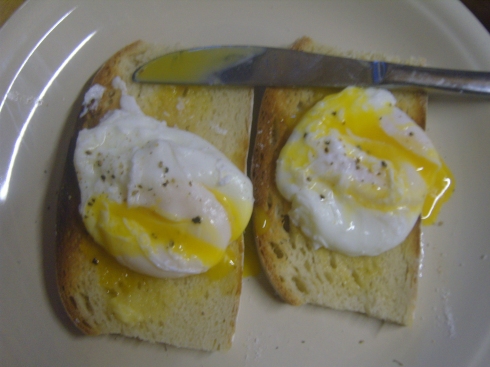
Between last night and this morning (perhaps in my sleep?), I seem to have mastered the art of poaching, as today’s eggs were even better than yesterday’s. This wouldn’t be a true Korsten-Chronicle if I didn’t post a recipe, so I will share my method with you.
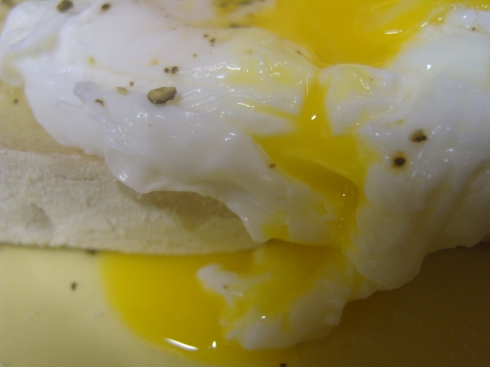
Oozy Suzie


The Perfect Poached Egg


You will need:

  • 1 fresh egg – Preferably organic free-range, unless you’re broke like me, in which case your bog-standard egg will do (Hint: if your bathroom is stocked with one-ply toilet paper, you can probably forgo the free-range thing with a clear conscience)
  • 1 tsp vinegar (I used white vinegar, but not really sure if it matters what kind you use)
  • A large pinch of salt
  • 1 medium sized pan
  • A small coffee cup
  • A wooden spoon (or his plastic cousin)
  • A slotted spoon or holey spatula (i.e. with holes – not a consecrated spatula)

1. Fill the pan with water, add salt and bring to a rolling boil.

2. Add the vinegar and reduce the heat to bring the water to a very sparse boil.

3. Meanwhile, crack the egg into the cup.

4. Using the wooden spoon, stir the water in a clockwise motion until a whirlpool forms.

5. Pour the egg into the water, following the direction of the vortex.

6. You do not need to bring the temperature of the water back up. Just leave it be and start your timer: about 1 ½ minutes for a soft yolk, and a bit longer (2-3 minutes) if you’re of the hard-boiled persuasion.

7. Remove the egg with the slotted spoon (requires delicacy!) and set aside on a wooden board to allow the excess water to drain off. Carefully remove any formless white bits from the surface of the egg before transporting it to your chosen dish.

8. Don’t forget to season – nobody likes a bland egg.
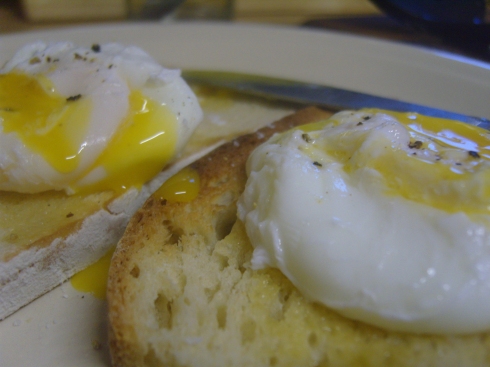
Today's Eggs


Happy poaching!

Mali.xxx


When is Banana Bread not Banana Bread?

When it’s Banana Bread Oatmeal!


Banana Bread Incognita


Banana Bread Oatmeal

  • 1/4 cup oats
  • 1 cup soy milk
  • 1 fresh or frozen banana, sliced (I used 95g frozen)
  • Pinch salt
  • 1/4 tsp vanilla
  • 1 tbsp flaxseeds
  • 1 tsp ground cinnamon
  • Pinch of mixed spice or ground nutmeg
  1. Place the oats, soy milk, banana, salt, vanilla and flaxseeds in a medium sized, microwave safe bowl.
  2. Microwave for 4 minutes on high, stirring and mashing with a fork at the end of each minute and making sure the mixture doesn’t boil over.
  3. Stir in the spices and blend the mixture with a hand-held blender or in a regular blender.
  4. Cover and leave to stand overnight.
  5. In the morning, eat cold or reheat for a couple of minutes before serving.


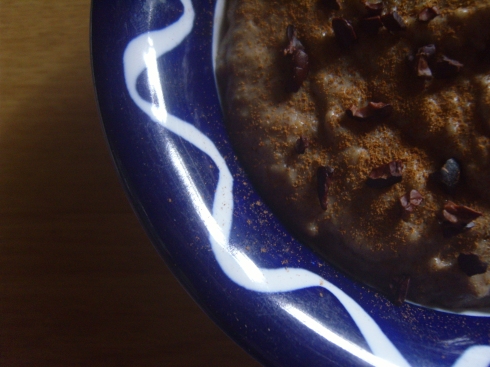
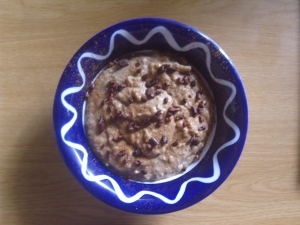
Sprinkled with cinnamon and cacao nibs


Yummy yummy. This is was perfectly sweet enough for me without any added sugar, but if you have a mega sweet tooth you could add a bit of your favourite sweetener. I find that cinnamon adds sweetness to things on it’s own – does anyone else agree?


In non-food news, today I’m busy planning my CD launch which is happening next Friday (25th) – very exciting! It’s looking to be a great night – we are having it professionally filmed, so I will be sure to link you to some clips when they’re available!


Have a great Thursday!


Much love and God bless,

Mali.xxx


Spiced Coconut Truffles

I am back, with perhaps my most successful recipe to date!


Since I am avoiding dairy and eggs, I have been enjoying coming up with new desserts. One of my absolute FAVOURITE sweet treats is Chocolate Truffles. As such, I tried my hand at creating a vegan version. Everyone who tried them loved them. They truly do melt in your mouth, and it’s very hard to just eat one!


So without further ado, here is the recipe:


Spiced Coconut Truffles

  • 300g dark chocolate
  • 1 cup coconut cream
  • A dash each of cayenne pepper, mixed spice and cinnamon
  • Desiccated coconut, for rolling in (the truffles, that is)
  1. Melt the chocolate in a double-boiler, or in the microwave for 3-4 minutes on 70%.
  2. Stir in the coconut cream and beat with a spoon till thoroughly combined.
  3. Leave to cool in the bowl and then refrigerate overnight, or till the mixture has set.
  4. Take spoonfuls of the set mixture and quickly roll into balls, then roll in the desiccated coconut.
  5. Savour and enjoy!


When I’ve found the USB cable for my camera I will upload pictures!


Much love,

Mali.xxx


Three Chias!

I FINALLY found Chia Seeds in South Africa! Yesterday I was rejoicing all the way from the Health Shop, super excited about what I was to do with my new purchase.

As you know, I am on an exclusion diet at the moment, to try and see if I can identify any foodstuffs that might cause of aggravate my health problems. Over the last few days I have been reintroducing oats (a gluten-containing food) and monitoring my reaction. I will let you know when I have come to a conclusion.

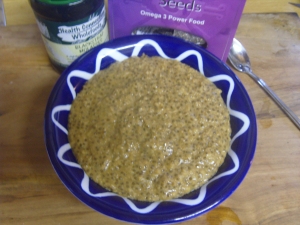
In the meantime, here is my Chia and Oatmeal extravaganza!

Coco-Chi Oatmeal

  • ½ cup oats
  • ½ cup soy milk + ½ cup water
  • 2 tbsp chia seeds
  • 1 cup hot water
  • 1 tsp blackstrap molasses
  • ¼ cup desiccated coconut

  1. Cook the oats in the soy milk and water for a couple of minutes.
  2. Stir in the chia seeds and cook for a further couple of minutes.
  3. Turn off the heat. Add the molasses and pour over the hot water.
  4. Leave for about 15 minutes to allow the chia seeds to swell.
  5. Bring back to the boil, add the coconut and simmer till all the excess liquid has been absorbed.
  6. Leave to settle for a minute or two before serving.

NB: Makes on HUGE serving – half the recipe if you have a mini appetite, or if you want serve it with something extra, or if you’re a 6-meal a day kinda person.


Tasteh!


This was AMAZING! Possibly the best breakfast I have ever created. It was deliciously creamy, subtly sweet, with the flavour of the coconut coming through in every delicious mouthful.

Some of you may have noticed that I’ve stopped using Protein Powder, so I thought I would share a quick word on protein… Firstly, I have really lost my inclination to eat meat. As for protein powder and egg whites – they’re out whilst I’m on this exclusion diet. So at the moment I’m not worrying too much about how many grams of protein I’m eating – and I don’t appear to have gotten any weaker for it (I’ve actually noticed an increase in my strength). This just goes to show that everyone’s bodies are unique and can respond to certain nutritional behaviours differently. My husband eats meat every day, and a meal doesn’t really feel complete to him without it. I, on the other hand, could go days without meat, and would only really miss it when eating out. Neither way is right or wrong – we just have different requirements and thus our bodies desire different nutritional staples.

I definitely think Chia Seeds are going to become one of my staples!

Lots of love,

Mali.xxx